How to Tell If Your Compost Worms Are Hungry, Healthy, or Stressed
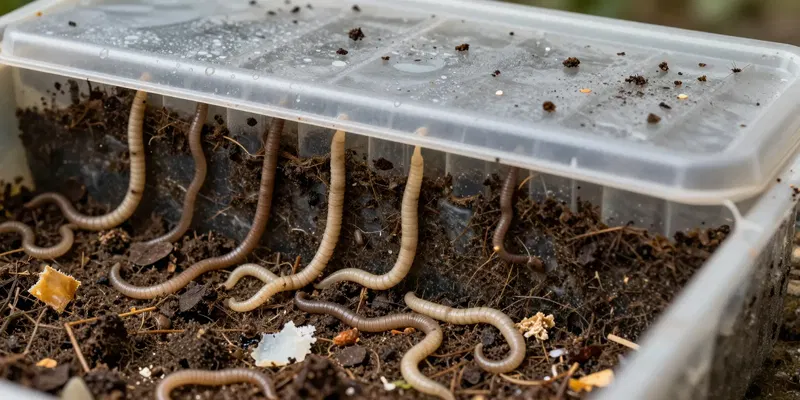
If you want healthy compost worms, stop looking for perfection and start looking for patterns. A healthy bin has worms spread through the bedding, especially around pockets of food, with a gentle earthy smell and a texture that feels like a wrung-out sponge. The worms themselves should look plump, slightly shiny, and active when disturbed. Not frantic. Just responsive. If you lift a piece of cardboard or pull back a layer of bedding, they should move away from light and tuck back down into the moist material.
Color matters too, within reason. Most compost worms are some shade of red, burgundy, or brownish red. A well-fed worm often looks fuller through the middle, and mature ones may show a visible band, called the clitellum, near the front. You may also spot lemon-shaped cocoons and plenty of dark castings, which is a great sign that the system is running well. In an indoor worm care setup, “boring” is actually good. A stable bin doesn’t smell sour, doesn’t have masses of worms trying to escape, and doesn’t swing wildly from soggy to bone dry. If your worms are quietly eating, breeding, and staying put, you’re doing more right than wrong.
How to Tell When Worms Are Hungry Without Mistaking It for a Problem
Hungry worms don’t hold up signs. They show it in the condition of the bin. The clearest clue is that the last feeding is mostly gone. Not just covered. Gone. Soft scraps like melon, pumpkin, lettuce, or banana peels disappear first, while tougher bits like avocado skins, onion layers, and corn husks can hang around much longer. If the food zones are turning into fine dark material and you’re seeing worms actively searching through nearby bedding, it may be time to feed again.
But here’s the thing: a beginner often assumes “visible worms at the surface” means hunger. Sometimes it does. Sometimes it just means that spot has the right mix of moisture, temperature, and partially decomposed food. A better test is to bury a small amount of easy food in one corner and check back in a day or two. If the worms gather there quickly and the food starts breaking down fast, they’re ready for more. If the old food is still sitting there untouched, don’t pile on. Overfeeding causes more trouble than slight underfeeding. In any vermicomposting beginner guide worth following, this is the rule that saves the most bins: feed based on what the worms finished, not on a calendar.
Common Worm Stress Signs That Show Up Before the Bin Really Goes Sideways
Worm stress signs are usually obvious once you know what you’re looking for. Worms crawling up the walls, bunching under the lid, or trying to leave the bin are not just being adventurous. They’re reacting to something off in their environment. The usual suspects are too much moisture, poor airflow, overheating, acidic food overload, or food rotting faster than the bedding can balance it. A bin that smells sour, swampy, or sharply rotten is waving a red flag.
Watch the worms themselves too. Stressed worms may look thin, unusually pale, limp, or oddly restless. If they stay balled up in a tight mass for long periods away from food, something may be wrong. If lots of them are hanging out at the very top or bottom instead of moving through the bedding, that tells you the middle zone may be inhospitable. A few mites, springtails, or fruit flies are not automatic disasters, but a sudden boom in pests often points to excess food or excess moisture. The bin doesn’t need to be sterile. It needs balance. Once that balance slips, worms tell you fast. The mistake is ignoring those early signs and assuming they’ll sort it out on their own.
The Fastest Way to Diagnose Moisture, Food, and pH Issues in an Indoor Bin
Most indoor worm care problems come down to three things: moisture, feeding rate, and balance between scraps and bedding. Start with your hand. Grab a fistful of bedding and squeeze. If water drips out, it’s too wet. If it falls apart like dry dust, it’s too dry. What you want is damp, springy material that holds together lightly and then breaks apart. Worms breathe through their skin, so moisture matters, but they also need air. A soaked bin can turn stale fast.
Then look at the food. Slimy mats of decomposing scraps, especially if they’re clumped together, can create hot, acidic pockets that worms avoid. Too many fruit scraps at once can also bring in flies and throw off the balance. Mix in dry shredded cardboard, paper, or coco coir if the bin feels heavy and wet. If it seems sluggish and dry, lightly moisten bedding and feed smaller amounts of soft food. For pH, you don’t need to become a chemist. If you’ve been dumping lots of citrus, pineapple, tomatoes, coffee grounds, or fermented scraps into a small area, back off and add more neutral bedding. A small sprinkle of crushed eggshell can help buffer things, but bedding is the real stabilizer. Think of food as fuel and bedding as the part that keeps the engine from overheating.
What to Do Right Now if Your Worms Are Acting Off
If your worms seem stressed, don’t panic-feed and don’t dump the whole bin into the yard in defeat. First, stop adding food for a few days. That alone solves a surprising number of problems. Next, lift and fluff the bedding gently to improve airflow, then add a generous layer of dry carbon material like shredded cardboard, plain paper, or dry leaves if you have them. If there are obvious rotten pockets of food, remove some. You do not need to scrub the bin clean. Just reduce the stuff that is actively causing trouble.
If the bin is too dry, moisten the bedding gradually instead of drenching one corner. If it’s too wet, leave the lid ajar for a bit if your setup allows it, add dry bedding, and hold off on juicy scraps. If heat is the issue, move the bin somewhere cooler and out of direct sun. If the worms are still clustered at the top after a correction, give them a day before making five more changes. Constant fiddling can stress them almost as much as the original problem. Good vermicomposting is mostly observation and small adjustments. When the worms settle back into the bedding, the smell turns earthy again, and the food starts disappearing at a steady pace, you’re back on track.
Reading the Bin Like a Pro Gets Easier Once You Stop Guessing
The best worm keepers are not the ones following rigid schedules. They’re the ones paying attention. A healthy system has a certain feel to it: moist but not swampy, active but not chaotic, earthy rather than sour, with worms distributed through the bin instead of staging an escape. Hunger shows up as finished food and eager feeding response. Stress shows up as avoidance, clustering, wall climbing, bad smells, and stalled breakdown. Once you learn those signals, the bin becomes much easier to manage.
This is why a vermicomposting beginner guide can only take you so far. Real improvement comes when you connect the worm behavior to what changed last week. Maybe you fed too much melon. Maybe the bedding compacted. Maybe the laundry room got hotter than usual. Worms are excellent little messengers. They react quickly and honestly. If you treat the bin less like a trash can and more like a living system, you’ll catch problems early, feed more accurately, and end up with healthier compost worms and better castings without turning it into some fussy science project.